How to Make a Bed: 8 Simple Steps
Table of Contents
Creating a tidy, comfortable bedroom begins with making your bed. Although the individual tasks are fairly simple, there are a number of details to keep track of, and they can vary depending on your bedding and your preferences. We’ll share eight simple steps for how to make your bed in no time, along with tips to get the most out of your bedding setup.
Making the Bed: Step-by-Step
To make the process of bed-making easy, we break it down step-by-step and provide illustrations. If a step involves bedding items that you do not own, simply skip that step.
1. Begin With the Bed Skirt
To put a bed skirt in place, lift up the mattress, set the bed skirt onto the foundation, then place the mattress back on top of the bed skirt. Once you have put the bed skirt in place, you don’t need to move it until you want to wash it.
Not everyone has a bed skirt, since they are decorative, rather than necessary. They come in a variety of colors, fabrics, and lengths and can help complement other decor in the room or hide under-the-bed storage.
2. Secure the Mattress Pad or Topper
If you have a mattress pad or topper, set it on top of the mattress and pull the straps around the four corners of the mattress.
Mattress pads and toppers are normally used to change the feel of the mattress, with many toppers designed to make a mattress feel softer.
Mattress pads and toppers may be made of a variety of materials, ranging from feathers to wool to foam. Generally, the primary difference between a mattress pad and a mattress topper is that a topper is thicker than a pad.
3. Add the Mattress Protector
If you have a mattress protector, you can either put it directly on the mattress or over the mattress pad or topper. A mattress protector shields the mattress from spills and damage without changing the feel of the mattress too much. Some protectors zip up completely to protect against dust mites and bed bugs.
4. Put On the Fitted Sheet
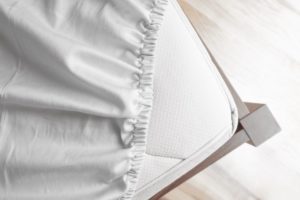
Some people find it difficult to put on the fitted sheet, but it can become easier with practice. First, lay the sheet on top of the bed and align the short sides of the sheet with the short sides of the bed.
Pick one corner of the sheet to begin with, and stretch the elastic of that corner all the way down so the fabric hugs beneath the mattress. Repeat the process with the other three corners.
Fitted sheets are available in multiple depths to fit mattresses of various thicknesses, as well as their pads and toppers. If your fitted sheet is extremely difficult to put on, or it continually slips off of the corners of the bed, you might need to purchase a fitted sheet with more depth.
5. Top Sheet Vs. No Top Sheet: The Great Divide
To put a top sheet, or flat sheet, in place, set it loosely on top of the bed with the softer or patterned side facing downward. Make sure the sheet is centered on the bed, then tuck it in under the foot of the bed and along the sides according to your preference.
The top sheet separates the sleeper from the top layer of bedding, helping keep it cleaner. That being said, a top sheet may be unnecessary if you’re using a duvet with a removable and washable cover, since you can take the cover off and wash it somewhat easily.
A Note on Hospital Corners
Hospital corners are made using an old method of snugly tucking in bedding that gives your bed a smooth, tidy look. These days, you’ll usually see them in hospitals, hotels, and military settings, but they’re easy enough to make at home.
To create crisp hospital-style corners, tuck the top sheet beneath the foot of the mattress. Then, step to one side of the bed, grab the edge of the top sheet about a foot and a half from the foot of the bed, and lift it toward the ceiling. Tuck the fabric hanging down from the sheet beneath the mattress. From there, hold the fabric at the corner of the mattress in place, then fold the remaining fabric downward and tuck it beneath the mattress as well. You should see a triangle-shaped fold at the corner of the mattress.
Repeat these steps on the other side of the mattress.
6. Place Your Comforter or Duvet
Now, it’s time to place your top layer onto your bed, whether this is a comforter, duvet, or quilt. Making sure that it is centered on the bed, fold a few inches of the top sheet over the head of the duvet. Tuck in the duvet at the foot of the bed and along the sides.
A duvet differs from other types of top layers, because it has a removable, washable cover. After washing a duvet cover, some people struggle to put it back on. There are two main ways to put on a duvet cover.
- Standard Method: Stand at one foot of the bed and have a buddy stand at the other foot. Lay the duvet cover across the mattress with the open end at the bottom of the bed. Each person should pinch a corner of the duvet together with the corresponding corner of the cover. Shimmy the rest of the duvet into the cover, align the top corners of the cover with the top covers of the duvet insert, and shake until the duvet fills the cover evenly.
- Burrito Method: Put the inside-out duvet cover flat on the bed with the opening at the foot. Align the duvet insert on top of the cover. Then, starting from the head of the bed, roll up both items together. When you get to the end, reach inside the cover opening at one end of the roll and pull the cover around the outside of the roll, with the patterned side facing out. Repeat the process on the other end of the roll. Now, you can unroll the ensemble working back the way you came. The duvet should enter into the cover through the unrolling process.
7. Fluff Up Your Pillows
Next, fluff your pillows by shaking them against a flat surface, and add them to the top of the bed. Having more pillows may help you achieve a preferred aesthetic, but they also take more time to arrange.
8. Top it Off With Throw Blankets and Pillows
The final step of making a bed involves adding any finishing aesthetic touches. For example, you might want to add a throw across the foot of the bed for a pop of color. Similarly, some people place smaller decorative pillows on top of their sleeping pillows.
Our Extra Bed-Making Tips
Making the bed can be an important part of a daily routine, as it helps provide a consistent and tidy sleep environment. Try these tips to help keep your bed ideal for restful sleep.
Make Your Bed Daily – It Matters
Try to make your bed daily. A nicely made bed may feel more comforting to fall into at the end of the day. By turning bed-making into a routine, it happens effortlessly and you’re more likely to stick with it over time.
Remember to Wash Your Bedding Regularly
Washing bedding regularly is important in order to maintain a hygienic sleep environment and keep dust mites and other allergens to a minimum. While different types of bedding can vary depending on use, most bedding should be washed every week or two.
Invest in Comfortable Material – It’s Worth It
The fabrics and filling of pillows, comforters, duvets, and sheets all affect how comfortable you feel in bed. While personal preference plays a role, most people prefer materials that are soft and breathable, to reduce skin irritation and heat buildup.

Still have questions? Ask our community!
Join our Sleep Care Community — a trusted hub of sleep health professionals, product specialists, and people just like you. Whether you need expert sleep advice for your insomnia or you’re searching for the perfect mattress, we’ve got you covered. Get personalized guidance from the experts who know sleep best.


